Security
Authentication
Metamapper uses JSON Web Tokens (JWT) for authentication. Tokens have a default TTL of 24 hours.
Overriding the Authentication Middleware
Authentication is handled via Django middleware. By default, Metamapper uses the django.contrib.auth.middleware.AuthenticationMiddleware class. This should be used in the vast majority of cases.
You can disable authentication by setting the following environment variable:
METAMAPPER_AUTHENTICATION_MIDDLEWARE=app.authentication.middleware.AnonymousAuthenticationMiddleware
You can also use your own custom middleware if you want specific authentication logic, such as restricting authentication to certain emails or using headers provided by a load balancers. We'll have some examples up here soon.
Encryption
Sensitive information, such as database passwords and authentication tokens, are encrypted at rest using Fernet symmetric encryption. This guarantees that sensitive variables cannot be manipulated or read without access to the encryption secret.
You define the encryption secret via the METAMAPPER_FERNET_KEY environment variable.
Generating a Fernet key
If you need to generate a new fernet key you can use the following code snippet.
from cryptography.fernet import Fernet
fernet_key = Fernet.generate_key()
print(fernet_key.decode())
Rotating encryption keys
No standard support yet, but we're working on it.
OAuth Authentication
Metamapper supports single sign-on out of the box for generic SAML2.0 applications. No extra configuration should be necessary – just set up your connection as suggested in this guide.
If you want to enable OAuth authentication via Google and/or Github, follow the respective guide below.
Google Setup
If you want to use Google OAuth to authenticate users, you need to issue credentials via Google Cloud Platform.
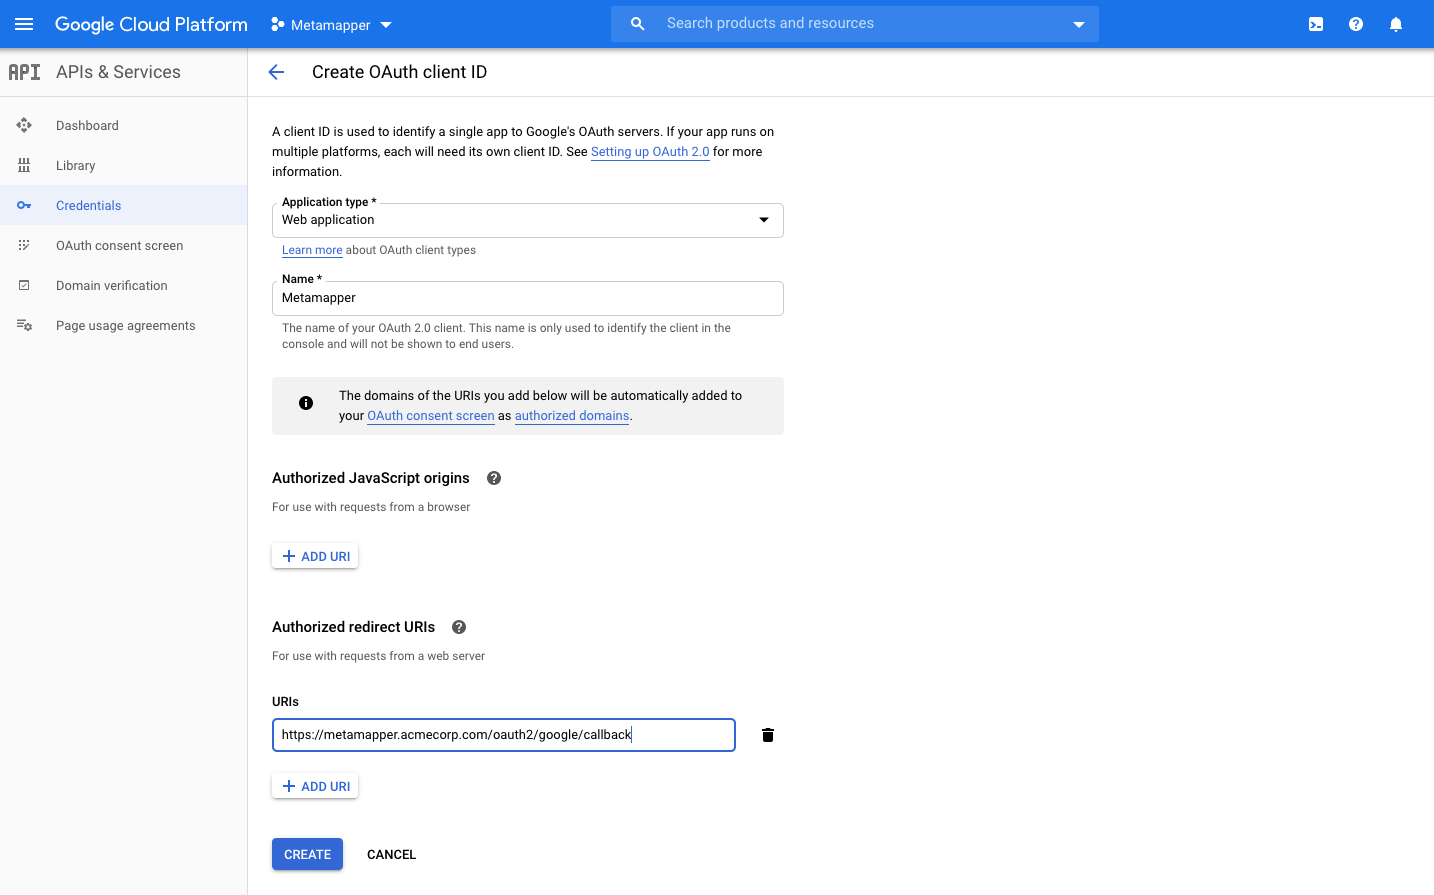
First, sign into the API manager and create a new project. Once you have done that, you can create a new set of OAuth credentials. You should use the "Web application" type and give it a recognizable name.
The callback URL should be set to: ${METAMAPPER_WEBSERVER_ORIGIN}/oauth2/google/callback.
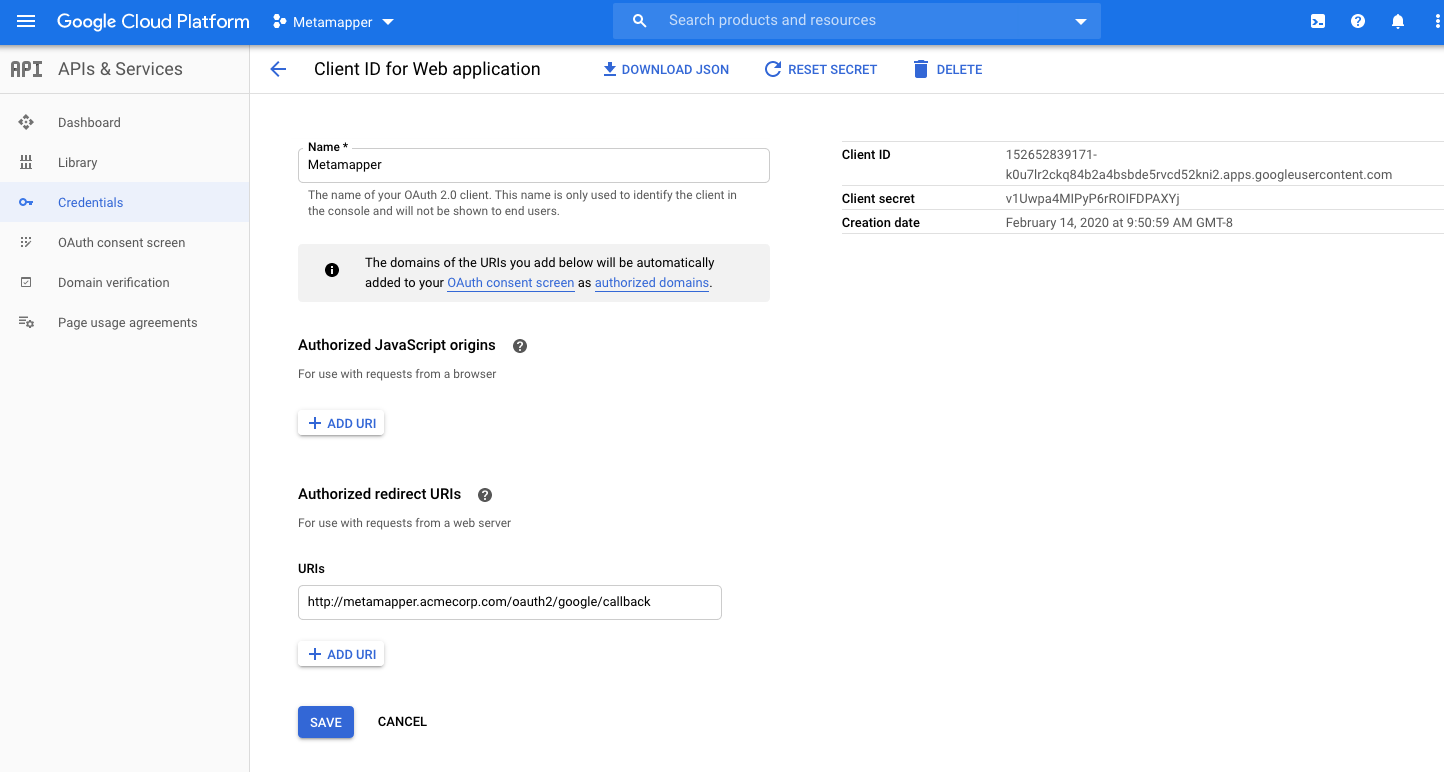
Once created, you will have access to the client ID and client secret. Set these in your .env file:
METAMAPPER_GOOGLE_CLIENT_ID(Google OAuth Client ID)METAMAPPER_GOOGLE_CLIENT_SECRET(Google OAuth Client Secret)
If the environment variables have been updated properly, you can go ahead and restart the webserver process (e.g, docker-compose up -d webserver). Once enabled, you should be able to set up a Github connection using this guide.
Github Setup
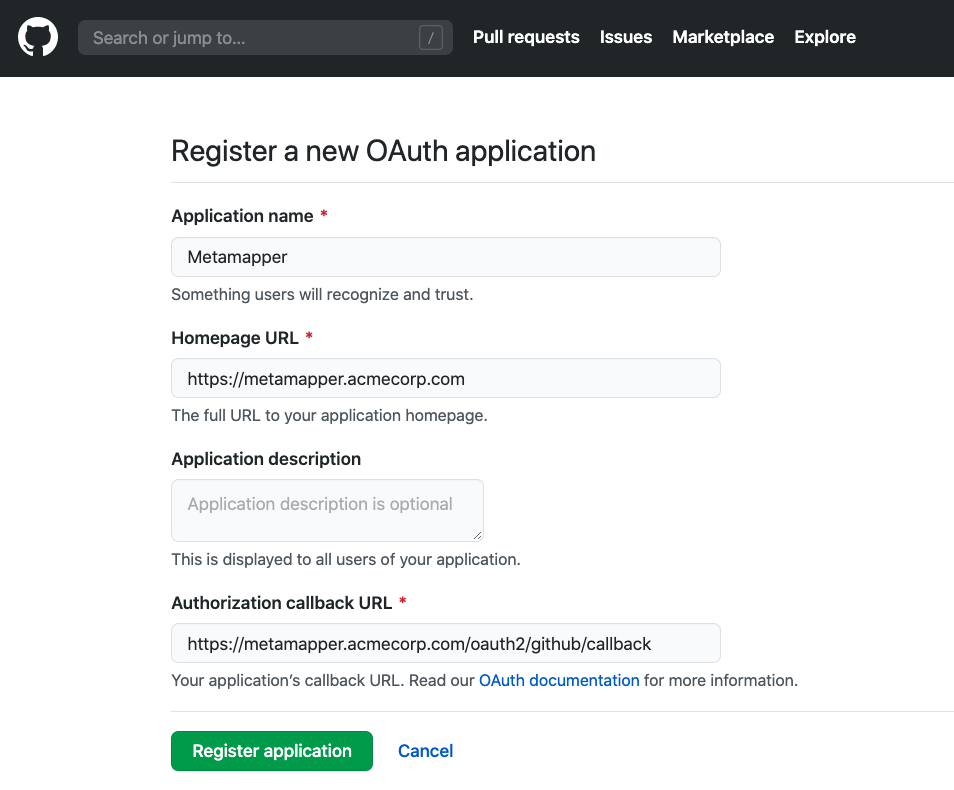
You will need a Github organization to set up Github OAuth to authenticate users. You will need to create an OAuth App, which can be done from your organization settings.
The callback URL should be set to: ${METAMAPPER_WEBSERVER_ORIGIN}/oauth2/github/callback.
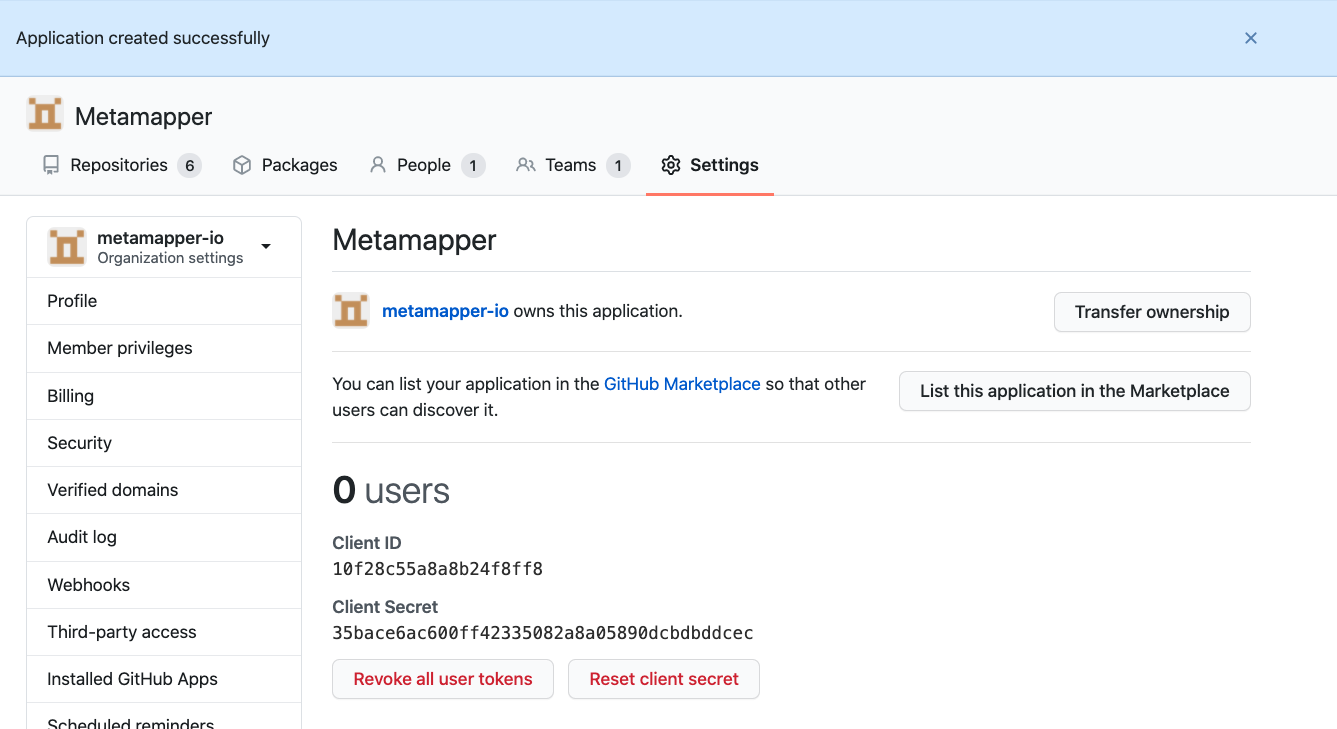
Once created, you will have access to the client ID and client secret. Set these in your .env file:
METAMAPPER_GITHUB_CLIENT_ID(Github OAuth Client ID)METAMAPPER_GITHUB_CLIENT_SECRET(Github OAuth Client Secret)
If the environment variables have been updated properly, you can go ahead and restart the webserver process (e.g, docker-compose up -d webserver). Once enabled, you should be able to set up a Github connection using this guide.