SSO Setup: SAML2
This is a guide on how to setup SSO using a generic SAML2.0 identity provider. It provides step-by-step instructions on setting up a generic SAML2.0 connectiong as an Auth0 application.
We are not suggesting that you specifically use Auth0, but are merely using it as an example. We imagine that most other providers, such as Okta and OneLogin, will follow a similar process.
This guide was last updated on June 30, 2020.
Register with IdP
Before creating your SSO connection, you will need to register with your identity provider.
Create a SAML 2.0 application within your IdP. You will need to navigate back and forth between Metamapper and Idp to complete the entire setup process.
Register IdP with Metamapper
You can start the SSO setup wizard from the Authentication tab of the Workspace Settings page.
Configure the IdP
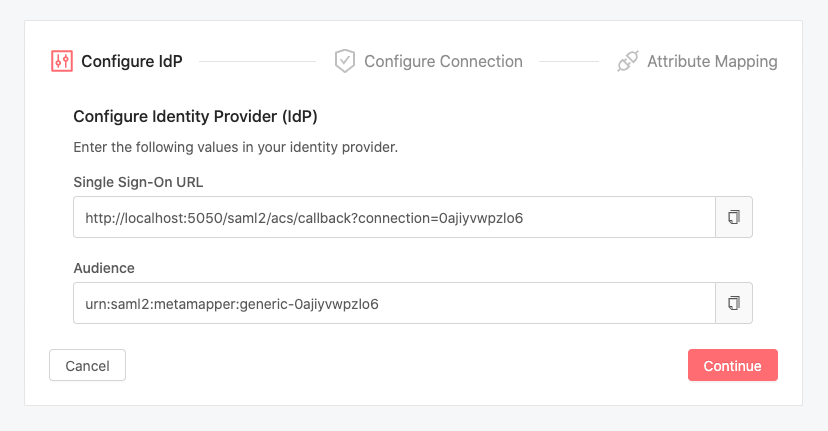
The first panel of the SSO setup wizard contains two important pieces of information that you will need to set up your connection.
The first attribute is the Single Sign-On URL. This is also commonly refered to as the application callback url. The IdP will submit the SAML assertion to this URL once a user has been successfully authenticated through the provider. When you start the SSO setup wizard, we reserve a unique identifer for the connection. This identifier will change if you refresh the page without saving.
${METAMAPPER_WEBSERVER_ORIGIN}/saml2/acs/callback?connection={{ reservedConnectionId }}
Important: Metamapper ACS endpoint uses HTTP-POST bindings.
The second attribute is the Audience. This uniquely identifies the connection and is needed for the the assertion process.
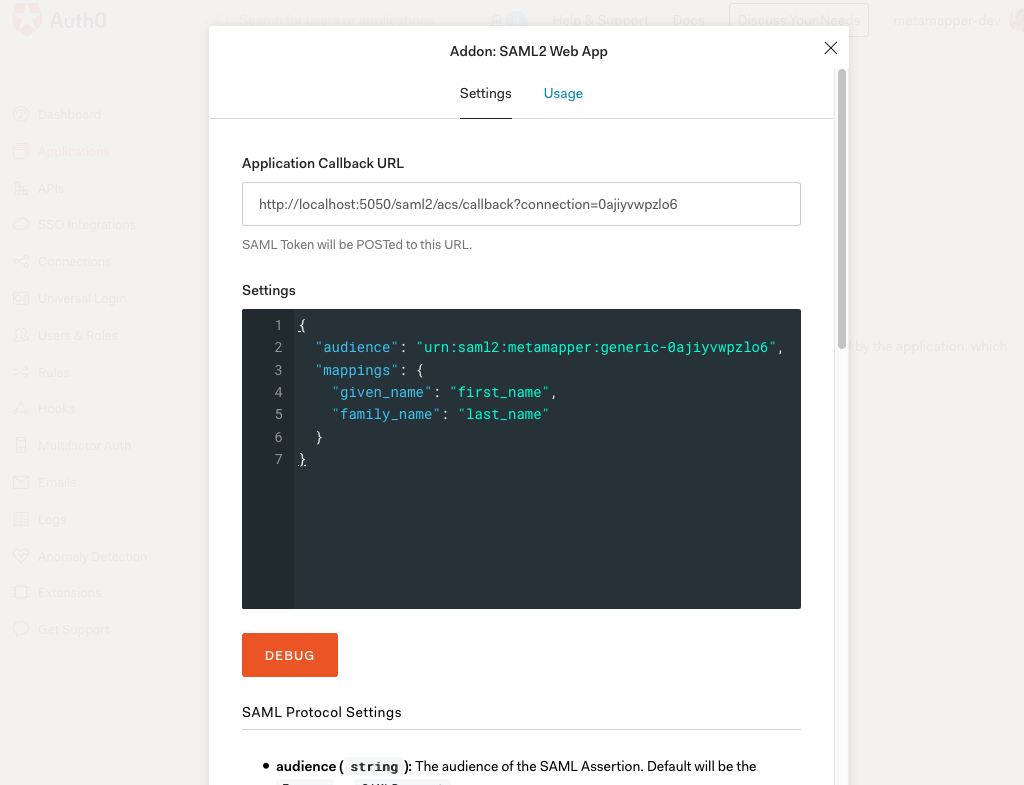
You will need to add these attributes to your IdP application settings so that Auth0 knows where to redirect authentication requests through:
Configure the Connection
The second section of the SSO setup wizard requires data that come from the Auth0 application:
- Entity ID - The globally-unique identifer provided by the IdP.
- SAML 2.0 Endpoint – The login URL provided by your IdP.
- X509 Certificate – The public key used in the assertion process.
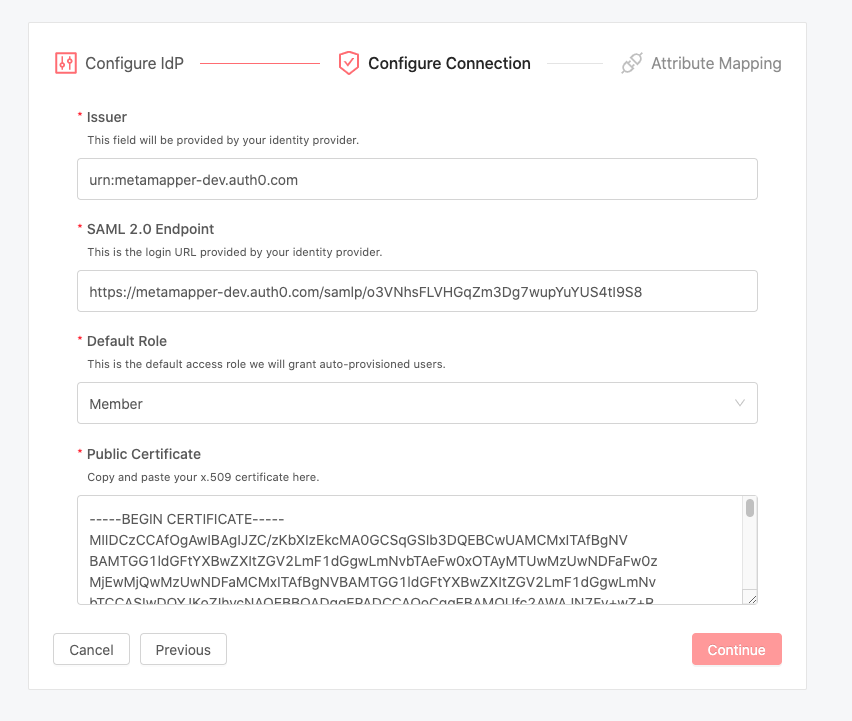
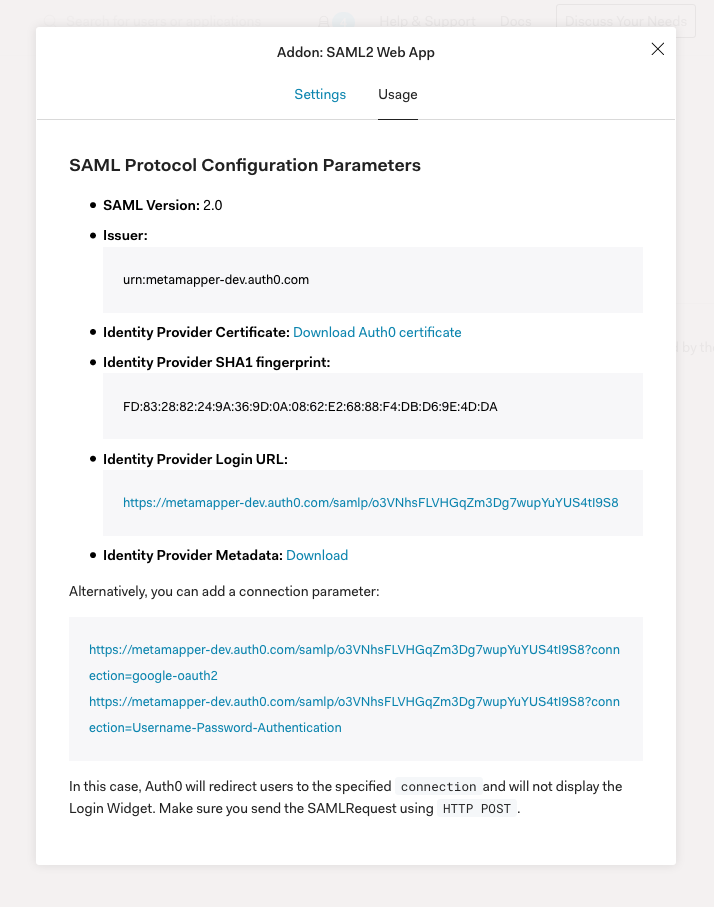
You should be able to find this information within the Auth0 application that you created at the beginning of this walk-through.
In the example below, the Login URL is synonymous with the SAML 2.0 Endpoint field.
Map IdP Attributes
The last section of the setup wizard is the attribute mapper. Here, the user fields in Metamapper must be matched up with the corresponding values from the user provided by the IdP.
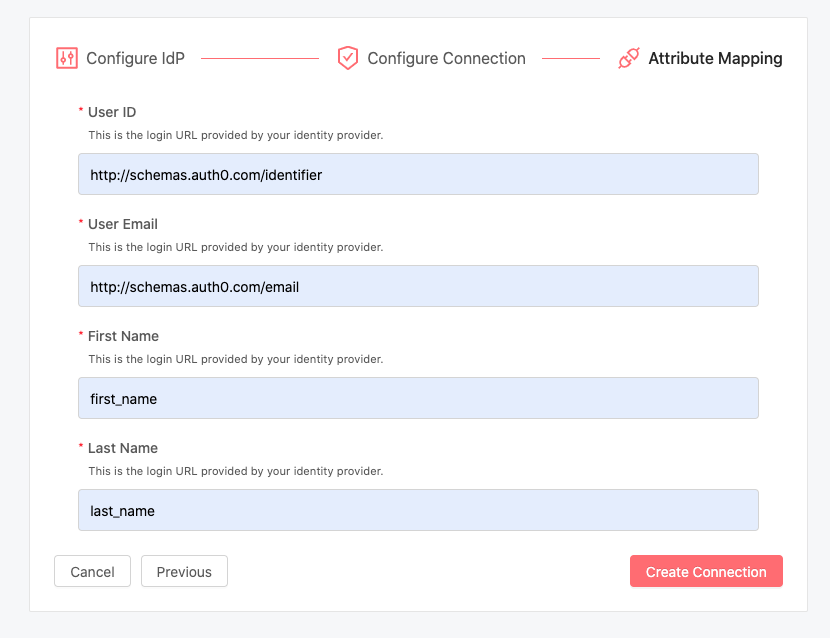
Metadata field names can vary from one provider to another. For example, one platform might use email, while another provider uses email_address.
Once the SAML integration flow is complete, you should be able to test the connection by logging out and attempting to login using Single Sign-On.
Remember, Metamapper uses Just-In-Time (JIT) provisioning. User accounts are created on the their first login with SAML SSO. These accounts will be assigned whatever default permission role you set when you created the SSO connection.